Monday, December 31, 2012

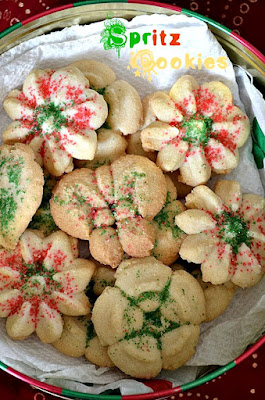
Spritz Cookies/Vanilla Cookies/Pressed Vanilla Cookies

                                                Wish You All a Happy New Year 2013

Spritz cookies are cute little cookies made by using a cookie press with different shapes and often called as pressed cookies.I got this recipe from the cookie press recipe booklet.
The original recipe is with egg but as I always prefer to make eggless version so used corn starch and baking soda to substitute the egg.The cookies came out delicious and crunchy.
These cookies can be eaten as such or decorate with sprinkles,jelly, royal icing,colored sugar to make it pretty for the holiday season.
I made these cookies for my son's holiday party in his school and packed the Christmas theme shapes such as Christmas tree,candy cane,only 15 cookies were left to take the pictures.
If you want to make the cookies using egg use an egg for the given measurement,here is the recipe.........

Ingredients

IngredientQuantity
Butter/Vennai(at room temperature)1/2cup(1 stick)
Granulated sugar1/2cup
All purpose flour/maida11/4cups
Corn starch 1tbs
Baking soda 1/8tsp
Baking powder1/8tsp
Salt1/4tsp
Vanilla extract1tsp
Cardamom/ellakai powder1/2tsp
Milk1/4cup
Colored sugaras needed(optional)


Method
  • Preheat the oven to 375 F,mix the flour,corn starch,baking powder and soda and keep it aside.
  • Combine the butter and sugar in a bowl,beat it with a hand blender until light and fluffy.
  • Add in the milk,vanilla extract,cardamom powder and salt,mix it well.
  • Now slowly add the flour mixture and mix it with a wooden spatula until mixed.
  • Pack the dough into the cookie press with the desired disc design.
  • Press the dough in the cookie press on an ungreased baking tray or sheet an inch apart.Sprinkle some colored sugar if needed on the cookie.
  • Bake it for 10-12 minutes or until golden,transfer to a wire rack to cool.
  • Store it in an air tight container.

Enjoy...................................................

  • Do not grease the baking tray otherwise the cookies won't stick to the baking tray.
  • If the cookies are hard to press add little more milk and adjust the consistency.
  • The cookies may be soft right from the oven,upon cooling it becomes crispy and crunchy.
  • Press the cookie press once only for a cookie.
  • For the mentioned quantity I got 25 cookies,to make it colorful you can add few drops of food color to the dough.


Sumber http://www.naliniscooking.com

Thursday, December 27, 2012

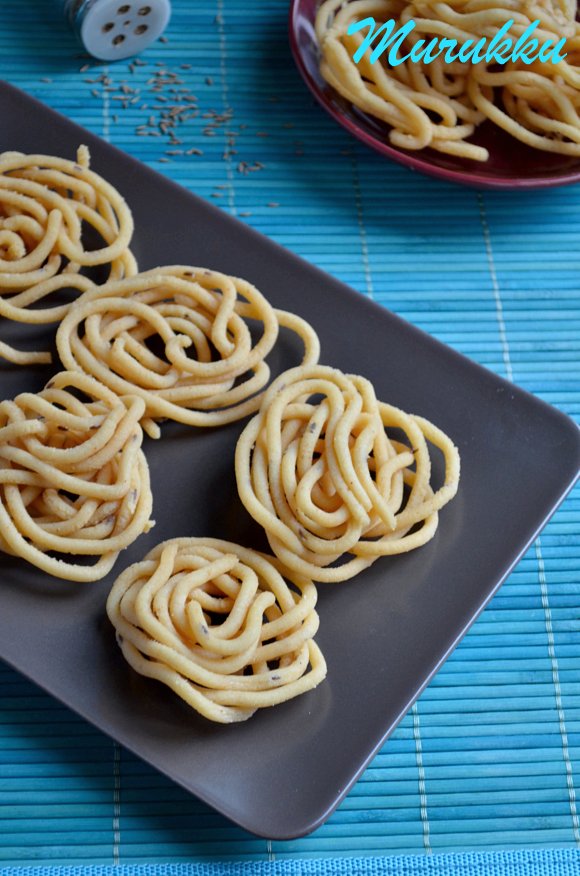
Murukku (version-2)/Chakli


For the final day of BM#23 I made spicy version of murukku with the cooked urad dhal and rice flour.I have already posted the Diwali Muruku or ThenkuzhalPaasiparuppu(moong dhal) murukku .But this is a slightly spicy version of murruku and my mom learnt it from her neighbor.Here goes the recipe for crunchy murukku..........

Ingredients

IngredientQuantity
Rice flour/arisi maavu2cups
Whole urad dhal/ullutham paruppu1/2cup
Chilly powder/milagai podi1tsp
Cumin seeds/jeeragam 1tsp
Asafoetida 1/8tsp
Butter2tbs
Saltto taste
Oilfor frying


Method

Pressure cook the urad dhal for 2-3 whistles with 11/2ups of water.Blend the cooked urad dhal in a blender to a fine paste and keep aside.
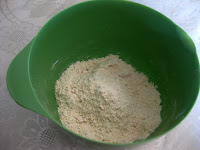
Take a wide mouth bowl and add rice flour,ground urad dhal,butter,chilly powder,salt,asafoetida,cumin seeds.Mix it well and sprinkle water little by little and make a soft dough.
Mean while heat a pan with oil,fill the murruku press with the prepared dough using the 3 eyed blade and squeeze it in the oil directly or in a small plates and drop it in the oil.Fry it in a medium till it becomes crisp and golden.Drain it on a paper towel and let it cool.
After cooling store it in a air tight container.


Enjoy..............................

  • The flour doesn't need of much water as the urad dhal has moisture in it.I used only 3tbs of water.
  • Butter can be substituted with 3tbs of hot oil.
  • Instead of cumin seeds,carom seeds or sesame seeds can be used.
  • Star shaped blade can be used.
Check out my fellow bloggers participating in BM#23.
Sumber http://www.naliniscooking.com

Wednesday, December 26, 2012

Chivda/Aval mixture

Today's recipe under traditional dishes for blogging Marathon#23 is Chivda a guilt free snack.This tea time snack is made with rice flakes(aval) which is popular in North India.We make the similar version of chivda with the puffed rice and follwed the same procedure.
This chivda can be made with both thin and thick variety of poha,today I used the thick variety.Now on to the recipe.......


Ingredients

IngredientQuantity
Thick Poha/rice flakes/aval1cup
Peanuts/verkadalai1/4cup
Roasted gram dhal/pottukadalai1/4cup
Cashews/mundidri paruppu 2tbs(broken)
Fresh Coconut Pieces 2tbs
Green Chilly(finely chopped)2nos.
Curry leaves/karivepillai2sprigs
Red chilly powder/milagai podi1/2-1tsp
Turmeric powder/manjal podi1/4tsp
Sugar1/2tsp
Salt1/2tsp
Oil2tsp


Method

  • Dry roast the poha/aval in pan in a medium flame till it becomes crisp and set it aside.
  • Heat a wide mouth pan with the oil,fry the coconut pieces,green chilly and curry leaves till it turns brown and crisp.
  • Then goes in peanuts,roasted gram dhal and cashews,fry it for a minute.
  • Now add the chilly powder,turmeric powder and turn off the stove.
  • Finally add the fried poha,salt,sugar and mix it well till everything gets mixed well.
  • Store it in an air tight container.

 Enjoy.................................................
  • Make sure after adding the red chilly powder and turmeric powder turn off the stove otherwise it will burn and becomes black.
  • Originally the recipe has dried coconut(copra),as it is not available here used the fresh coconut pieces and fried.
  • The chivda tastes even better the next day,as the flavors get incorporated well.
  • Crushed garlic can also be added along with the curry leaves for extra flavor.
Check out my fellow bloggers in Blogging Marathon#23.


Sumber http://www.naliniscooking.com

Tuesday, December 25, 2012

Karanji/Kajjikayalu/Karchikai/Sweet Somas

Today is the 4th week of blogging marathon#23 and I will be blogging under the traditional dishes.
Karanji is a sweet which is popular in Maharastra whereas it is named as sweet somas or karchikai in TamilNadu and Kajjikayalu in Andhra.The shape of making the sweet is same and varoius kinds of stuffing is used in each part of the state.
Coming to today's recipe,it  is a simple and easy to make stuffing with the basic ingredients and the stuffing can be made in advance.
This sweet is one of my child hood favorite and my paternal grandmother is an expert in making this sweet.Whenever she used to visit us she brought this sweet and used a special gadget called somas karandi(spoon) to trim the edges.As I don't have that one, used the pizza cutter to trim the edge and pressed with the fork to get the decorative edge.Here is the recipe................
Ingredients
For the outer covering
IngredientQuantity
All purpose flour/Maida1cup
Semolina/rava11/2tbs
Ghee2tbs
Salt 1/8tsp
Oil for frying
For the Stuffing
IngredientQuantity
Roasted gram dhal/pottukadalai3/4cup
Coconut(grated)1/2cup
Sugar1cup
Cardamom/ellakai 3nos.
Roasted semolina 1tbs(optional)
Finely powdered cashews1tbs(optional)


Method

             Mix the semolina,maida and ghee together,add water little by little and make a firm dough.Keep it aside for 2 hours.
Powder the roasted gram dhal and sugar+cardamom separately and put it in a bowl.Now heat a pan, dry roast the coconut till aromas comes and  golden.Add it to the gram dhal and sugar mixture,mix it well.The stuffing is ready.
Divide the dough into a gooseberry size balls and roll into a thin poori.Keep 2tsp of stuffing in it and apply water on the edges.Fold and seal the edges.
Now trim the edge with the pizza cutter or somas spoon and with the fork gently press and decorate the edge,keep it on plate covered with a cloth to prevent drying.Continue for rest of the dough.
Fry 3-4 pieces in the oil for one batch in a medium heat till it becomes crisp and golden color.Remove it and drain it on a paper towel.
E
After cooling store it in an air tight container.
Enjoy.....................................

  • Somas stay fresh and crisp for a week if it is stored in an air tight container.
  • Fry it in a medium flame to get a crispy and golden colored somas.
  • Adding the roasted rava and ground cashews is purely optional but gives a rich taste. 
  • While pressing with the fork make sure on to press on the top layer otherwise the stuffing will come out.
Check out my fellow bloggers participating in Blogging Marathon#23.
Sumber http://www.naliniscooking.com
Monday, December 24, 2012

Suji Cookies


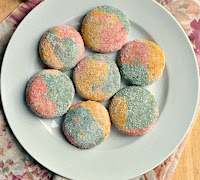
Suji cookies are mouth melting cookies which is very popular in Malaysia.I have bookmarked these cookies from Uma's Kitchen Experiments which she adapted from Fun wid Food.
I bookmarked this long time back and didn't get a chance to make these yummy cookies.Last week when I got a mail from Hubby dear's office for a baking competition,without any second thought I baked these delicious cookies.It came out very nice and mouth melting with the flavor of ghee.Now on to the recipe..................

Ingredients

IngredientQuantity
All Purpose Flour/maida1cup
Ghee/clarified butter/nei1/2cup
Icing sugar1/2cup
Roasted ground almond1/2cup
Baking powder 1/2tsp
Baking soda1/2tsp
Salt1/8tsp
Vanilla Extract1/2tsp
Food Color(pink,yellow,blue)few drops
Caster sugarfor coating the cookies


Method

                           Mix all purpose flour,salt,baking soda and powder,sift it.To this add the icing sugar.
Then add the almond powder,ghee and vanilla extract.
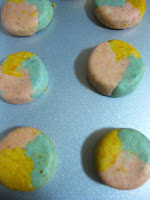
Mix it well and make a dough.Divide the dough into 3 equal portions and to each portion add each of the color,mix it.Take a small dough in each colored dough.
Roll it smoothly between the palms and flatten it to a disc.Arrange the flatten discs on a greased baking tray with 2 inches apart.Bake it in 325F for 15-17 minutes(mine took 15 minutes).
Once the cookies cool completely,coat it with the caster sugar and arrange it on a plate.
Suji cookies are ready.

Enjoy..............................................

  • The cookies enlarge while baking so make sure to get a small gooseberry sized dough from each color.
  • Measure the butter after melting and almonds needs to be roasted and ground,I kept in the microwave for 3 minutes.
  • While coating in the caster sugar the cookies should be cooled down completely.

Sumber http://www.naliniscooking.com