Thursday, March 31, 2016

Akkaravadisal/Akkaraadisal - Trichy - Srirangam Special


We are entering April month and its going to be food and fun filled month for our Blogging Marathoners.
Some of my readers know that I participate in a monthly event blogging marathon,3 days for 4 weeks.Since April 2013 we are doing a mega marathon for the month of April and September with interesting themes.
We are running in a mega marathon,Journey through the cuisine A- Z series of 26 dishes with Sundays off.We are going to share 26 dishes from a specific country/ region or combo of Indian states.
After so much research,discussions and experiments I landed in Tamil Cuisine.I will be sharing the recipes popular in most of the districts and places in Tamilnadu.
Coming to today's recipe it a quite popular Prashadam/neivedhyam offered in Srirangam Renganathar temple.
Akkaravadisal is more like sakkarai pongal,the only difference is the rice is cooked in milk.The texture will be more creamy and mushy,flavored with saffron.In temples this prashadam is made in a traditional bronze pot and wooden fire stove.
Some of the local and hotels neary by Srirangama area has akkaravadisal in their menus.Even the wedding caterers also have it in their menus.They use some artificial colors to get an appealing look also they grind half of the cooked rice to get a mushy consistency since large quantities are made.Also different methods are followed with sugar only or sugar jaggery combo.
As my family doesn't like so much of mushy consistency I didn't mash it so much.I made it with jaggery alone.To reduce the cooking time I used the pressure cooker to cook the rice and dhal.It can be made in open pot method also.Off to the recipe.......


                                               Akkaravadisal/Akkaraadisal


   Basic Information

   Preparation time 10 minutes
   Soaking time 10 minutes
   Cooking time 35-40 minutes
   Serves 4-5 (generously)


  Ingredients

  
Ingredient
Quantity
Raw rice/pacharisi
 1/2 cup
Moong dhal/paasi paruppu
4 tbs
Jaggery/vellam
1 cup+2 tbs
Ghee/nei
6 tbs
Milk
2 cups
Water
1 cup
Cashews/mundiri
3 tbs(broken)
Cardamom powder/ellakai podi
1/4 tsp
Edible camphor/pachakarporam
small rice grain size
Saffron/kungumapoo
a generous picnh


  Method 
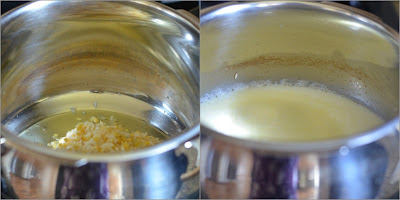
  • Soak the rice and dhal  in water for 10 minutes and drain the water completely and keep it aside.Heat a pressure cooker with a tsp of ghee and fry the soaked rice and dhal for couple of minutes without changing the color.Add around 1.5 cups of milk and water to it.
  • Add a small plate or fork to the pressure cooker to avoid the overflowing of milk.Cook it for 4-5 whistles in a medium flame.Once the pressure subsides,mash the cooked rice and add the rest of the milk.
  • Meanwhile melt the jaggery with 1/4 cup of water and pass it through a strainer.Also soak the saffron threads in a few tsp of warm milk.Fry the cashews in a tsp of ghee.
  • Add the melted jaggery to the mashed rice.Now add the ghee little by little and cook it in a medium flame for 5 minutes.
  • Now add the soaked saffron and cardamom powder and mix it well.Finally add the fried cashews and edible camphor,mix it well. 
  • Serve it hot.


  • Raisins can also be added for extra rich taste.
  • The amount of water depends on the quality of rice.
  • If you want the consistency to be very mushy then blend half of the cooked rice in the blender.
  • Tastes better when it hot.


Enjoy..................................


Check out the Blogging Marathon page for the other Blogging Marathoners doing BM# 63


Sumber http://www.naliniscooking.com

Monday, March 28, 2016

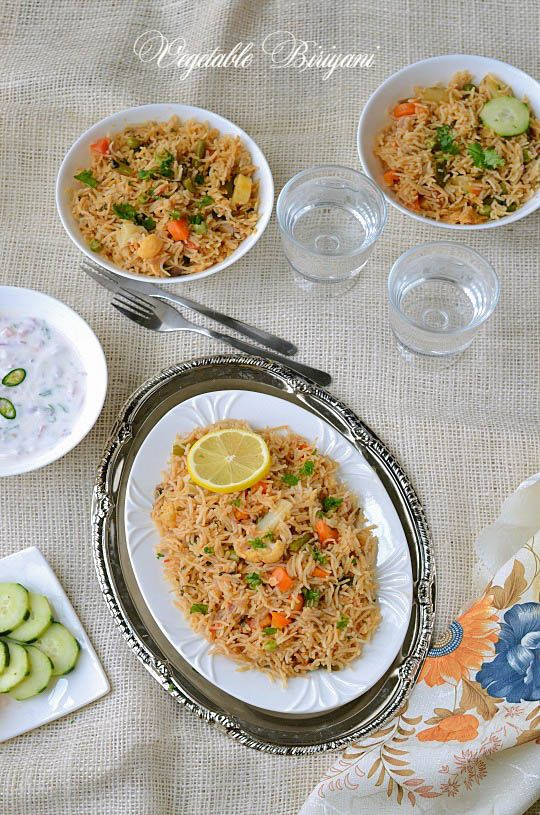
Vegetable Biriyani - Pressure Cooker Method


Coming to day 3 of Blogging Marathon#62 under the theme quick dishes I am sharing a one pot meal.This biriyani can be made in 30 minutes if the veggies are chopped and kept or even frozen veggies can also be used.
As I have the habit of chopping veggies for the next day cooking this takes only 20-25 minutes of cooking.Also I use the boiling hot water to cook the rice faster.When the rice is cooking in the pressure cooker you can make either a simple raita or an egg omelette to pair up with this biriyani.


                                          Vegetable Biriyani - Pressure Cooker Method


   Basic Information

   Preparation time 20 minutes
   Soaking time 10 minutes
   Cooking time 25- 27 minutes
   Serves 3(generously)


  Ingredients

  
Ingredient
Quantity
Basmathi rice
 1.25 cups
Onion(thinly sliced)
2 medium size
Tomato(finely chopped)
2 medium size
Carrot (chopped into 1 inch piece)
Beans((chopped into 1 inch piece)
10-13
Green peas/pacha pattani
1/4 cup(fresh or frozen)
Potato(cubed)
1(medium size)
Cauliflower florets
1 cup
Ginger&garlic paste
2 tbs
Green chilly/pachamilagai
4-5 (slit lengthy)
Mint leaves/pudina
a fistful(chopped)
Coriander leaves/kothamalli
as needed(finely chopped)
Yogurt/thayir
2 tbs
Red chilly powder/varamilagai podi
1/2 tsp
Coriander powder/dhaniya podi
3/4 medium size
Garm masala powder
1/4 tsp
Lemon juice
2 tsp
Salt
1.5tsp
Oil
2 tbs
Ghee/nei
1 tbs
Hot water
2.25 cups


  For the tempering

Ingredient
Quantity
Clove/lavangam
4-5
Cinnamon/pattai
2 inch piece
Bay leaf
 1 
Star anise
Green cardamom
 1 
Fennel/sombu
1/4 tsp


  Method 
  • Soak the basmathi rice in water,meanwhile heat a pressure pan or cooker with oil and ghee,do the tempering with the given ingredients.Add the sliced onion and green chilly along with a pinch of salt.Saute it for a minute,then goes in the chopped coriander and mint leaves.Continue sauteing until the onion turns transparent. Add in the ginger& garlic paste,fry it till the raw smell disappears.
  • Now add the yogurt and fry it for a minutes,then goes in the chopped tomatoes.Cook it until mushy..Add the chopped veggies and green peas,mix it well.Add in salt and garam masala powder.Now completely drain the water from the soaked rice and add it.Give it a mix till everything gets blend well.
  • Add in salt and spice powders,now completely drain the water from the soaked rice and add it.Give it a mix till everything gets blend well.Add in the chopped potato and cauliflower,mix it well.
  • Now add the hot water and let it boil.Add the lemon juice and some chopped coriander leaves.Cover it with the lid and cook it for 2 whistles in a medium flame and put off the flame.
  • Serve it with raita and chips


  • Cashews can also be added for extra rich taste.
  • The amount of water depends on the quality of rice.
  • Add the cauliflower and potato tend to cook faster,I added before adding the rice..
  • Do not cook for more than two whistles,otherwise the rice will turn out mushy.

Enjoy.........................................

Check out the blogging marathon page for the fellow bloggers participating in BM#62.


Sumber http://www.naliniscooking.com

Friday, March 25, 2016

Rava Tomato Bath/Tomato Rava Bath/Semolina Tomato Bath


To make a quick dish for myself on a lazy day,I prefer to make one pot meal or upma.As my family say a big no to upmas and kichadi I make it for lunch,once in a while to satisfy my cravings.
My mom used to make mixed vegetable masala kichidi/bath whenever we are bored with regular upam..The same recipe I make it with little more tomato and no veggies.If the semolia/rava is roasted then this can be made in no time.To fasten the cooking process I used the hot water to cook the semolina.


                                        Rava Tomato Bath/Tomato Rava Bath


   Basic Information

   Preparation time 10 minutes
   Cooking time 20 minutes
   Serves 2


  Ingredients


Ingredient
Quantity
Semolina/rava
3/4 cup
Green chilly/pachamilagai
2 slit lenghty
Onion( finely sliced)
1 (medium size)
Ginger&garlic paste
2 tbs
Tomato(pureed)
1(large size)
Turmeric powder/manjal podi
1/4 tsp
Red chilly powder/milagai podi
1/4 tsp
Coriander powder/dhaniya podi
1/4 tsp
Garam Masala powder
a pinch
Salt
3/4 tsp
Curry leaves/karivepillai
few leaves
Coriander leaves(chopped)
1 tbs
Cashwes/mundiri(optional)
2 tsp(broken)
Oil
1.5 tbs

 For the tempering

Ingredient
Quantity
Cloves/lavangam
3
Cinnamon/pattai
1 inch piece
Star anise
1 (petal)
Fennel seeds/sombu
1/4 tsp
  
   Method 
  • Heat the pan with 2 tsp of oil and roast the rava in a medium flame for 3-4 minutes or  nice aroma comes out.Remove it and heat the remaining oil in the pan and do the tempering with ingredients.Fry the cashews.Meanwhile boil 2.5 cups of water in the next burner.

  •  Add the sliced onion,curry leaves and green chillies along with a pinch of salt. Saute till transparent,add in the ginger&garlic paste and fry it for couple of minutes.Then goes in the pureed tomato.Fry it for a minute.

  • Now add in all the spice powders and salt,mix it well.At this stage add the roasted rava and mix it well till everything blends well.

  • Add around 2.5 cups of boiling water and stir it well till the water is absorbed.Cover it with a lid and cook it in a slow flame for 3-4 minutes.Finally add the chopped coriander leaves and put off the flame.
  • Serve it with coconut chutney or onion raita.


  • Rava needs to roasted well otherwise the bath will be sticky.
  • Instead of garam masala tempering mustard,urad and channa dhal can be used.
  • Fresh or frozen peas can also be added while sauteing the onion. 


Enjoy.........................................

Check out the blogging marathon page for the fellow bloggers participating in BM#62.


Sumber http://www.naliniscooking.com

Thursday, March 24, 2016

Vendhaya Kulambhu/Vendhaya Kara Kulambhu


We are entering the final week of Blogging Marathon #62 and for this week I chose to share quick meals.
Since my week days cooking is always simple and takes 30-40 minutes.But I do some of the preparations in the previous day itself.Prior preparation makes the morning cooking so easy.
As my Hubby prefers mostly South Indian food,every other day is a simple and comforting South Indian menu.Today's recipe is a flavorful vendhaya kulambhu and paired it with cabbage kottu and rice.
For this kulambhu preparation I used the store bought tamarind paste and chopped the cabbage previous day,kept it in the refrigerator.As both needs coconut paste I ground it together and used.I kept the rice in an electric cooker and while the kulambhu is boiling I made the kootu.Lets move on to the recipe...........


                   Vendhaya Kulambhu/Vendhaya Kara Kulambhu          


   Basic Information

   Preparation time 10 minutes
   Cooking time 15 minutes
   Serves 3(generously)


  Ingredients


Ingredient
Quantity
Shallots/chinna vengyam(chopped finely)
8-10
Red chilly powder/milagi podi
1.5 tsp
Coriander powder/dhaniya podi
2 tsp
Turmeric powder/manjal podi
1/4 tsp
Tamarind paste/puli
1-1.5 tbs
Salt
1 tsp
Oil
1.5 tbs
Curry leaves/karivepillai
few leaves

 Grind to a fine paste


Ingredient
Quantity
Coconut(grated)
2 tbs
Cumin seeds/jeeragam
1/2 tsp
Fennel seeds/sombu(optional)
1/2 tsp

 For the tempering


Ingredient
Quantity
Mustard seeds/kadugu
1/2 tsp
Fenugreek seeds/vendhayam
3/4 tsp
Dried red chilly/varamilagai
2 (broken)
Asafoetida/perungayam
a pinch


   Method 

  • Heat the oil in a pan,crackle the mustard seeds,fenugreek seeds.Add the asfoetida and dried red chilly. Add the chopped shallots with a pinch of salt. Saute till transparent,add in  the spice powders like red chilly powder,coriander powder and turmeric powder,fry it for couple of minutes.if its too dry sprinkle some water.

  • Now add the tamarind paste and a cup of water.Let it cook for a boil.Add in the salt and let it boil for 4-5 minutes.Add in the ground coconut paste.

  • If needed add around 1/2 cup of water and boil it for 2-3 minutes.Let it simmer for another couple of minutes and put off the flame.

  • Serve it with rice and kottu or pappad


  • Instead of shallots,onion can be used.
  • Fenugreek seeds need to crackle completely in the oil otherwise the kulambhu may turn bitter.
  • As my red chilly powder was spicy I used 1.5 tsp,it can increased up to 2 tsp.


                   Cabbage Kottu/Muttaikose Kottu


   Basic Information

   Preparation time 10 minutes
   Cooking time 15 minutes
   Serves 3(generously)


  Ingredients


Ingredient
Quantity
Cabbage/muttaikose(shredded)
3 cups
Channa dhal/kadala paruppu
3 tbs
Green chilly/pachamilagai
2(slit lengthy)
Onion(finely chopped)
2-3 tbs(optional)
Salt
1/2 tsp
Oil
2 tsp
Curry leaves/karivepillai
few leaves

 Grind to a fine paste


Ingredient
Quantity
Coconut(grated)
2 tbs
Cumin seeds/jeeragam
1/2 tsp

  For the tempering


Ingredient
Quantity
Mustard seeds/kadugu
1/2 tsp
Urad dhal/ulutham paruppu
3/4 tsp
Dried red chilly/varamilagai
2 (broken)
Asafoetida/perungayam
a pinch


   Method 

  • Pressure cook the channa dhal for 2-3 whistles in a pressure cooker and grind the coconut,cumin seeds to a fine paste.
  • Heat the oil in a pan,do the tempering with the ingredients,add the chopped onion,shredded cabbage. Saute it for 2 minutes,then add around 1/2 cup of water and cook it covered for 5 minutes.
  • Now add the cooked channa dhal and mix it well,cook it for a minute.Then goes in the ground paste and cook it for 2-3 minutes or till the raw flavor goes off.Put off the flame.
  • Serve it as an accompaniment.


  • Instead of channa dhal,moong dhal can also be used..
  • Addition of onion is purely optional,also green chilly can grind along with coconut.


Enjoy........................................

Check out the blogging marathon page for the fellow bloggers participating in BM#62.


Sumber http://www.naliniscooking.com

Saturday, March 12, 2016

Mixed Vegetable Egg Bhurji/Kaikari Muttai Podimas


Coming to the final day of the theme under bhurji recipes in Blogging marathon#62 is mixed veggie egg bhurji.
This recipe is similar to egg bhurji and uses lot of veggies.This recipe I noted down from a T.V show and tired it couple of times with other veggies too.
Here I used one extra large egg and its easily served 2,but if you are using a regular egg,2 eggs are needed.


                 Mixed Vegetable Egg Bhurji/Kaikari Muttai Podimas


   Basic Information

   Preparation time 15 minutes
   Cooking time 12 minutes
   Serves 2


  Ingredients


Ingredient
Quantity
Egg
1-2
Carrot(grated)
2-3 tbs
Beans(finely chopped)
2 tbs
Cabbage(shredded)
a fistful
Tomato(finely chopped)
1(small size)
Onion(finely chopped)
1(small size)
Red chilly powder/milagai podi
1/2 tsp
Black pepper powder/milagu podi
1 tsp
Garam Masala powder
1/4 tsp
Turmeric powder/manjal podi
1/4 tsp
Cumin seeds/jeeragam
1/2 tsp
Coriander leaves(chopped)
1 tbs
Curry leaves/karivepillai
few leaves
Oil
1 tbs


   Method 

  • Heat the oil in a pan,crackle the cumin seeds and add the chopped onion with a pinch of salt. Saute till transparent,add in all the veggies and fry it for couple of minutes.Cook it covered for a minute or two,till the veggies become tender.Add in all the spice powders,salt and give it a mix.

  • Now add the whisked egg,coriander leaves and mix it well till the egg is completely cooked.Put off the flame.
  • Serve it along with rice or roti.


  • Onion needs to be chopped finely.
  • Finely chopped cauliflower can also be used..
  • Here I didn't use green chilly,so added little extra red chilly powder. 


Enjoy.................................

Check out the blogging marathon page for the fellow bloggers participating in BM#62.


Sumber http://www.naliniscooking.com