Tuesday, January 22, 2013

Gulab Jamun - My 200th Post

This is my 200th post and want to share our family's favorite sweet Gulab jamun.Before getting into the recipe I would like to thank ally readers and friends for the constant support and encouragement.
Originally gulab jamun is made with fresh khoya by condensing the milk to a solid consistency.After that a considerable amount of all purpose flour is mixed to form a soft dough.The dough is made into cute ball and deep fried in the ghee then dunked into cardamom or rose flavored sugar syrup.After soaking an hour or two delicious juicy gulab jamuns will be ready to dig in.It can be eaten as such or served it along with a scoop of vanilla ice cream to make it more tasty.
But these days so many ready made mix for gulab jamun is available in the market to make the job easier.I also used to buy the readily available mix till I met a friend 3years back.She made this yummy sweet in a scratch with the milk powder.When I asked for the recipe she humbly shared this recipe. Today I made this exotic sweet with the dry non fat milk powder and it came out very delicious and spongy.As I had to take the picture in the natural light I couldn't wait till the balls get soaked.After soaking for two hours the jamuns were almost double in size.Now on to the recipe.........................


Ingredients

IngredientQuantity
Milk Powder1cup
All purpose flour/maida2tbs
Ghee/clarified butter/nei2tbs
Cooking Soda a generous pinch
Milk(to knead) as needed
Sugar13/4-2cups
Cardamom/ellaki powder1/2tsp
Water11/2cups
Oil/gheefor frying


Method
                    Heat the sugar in a pan with 11/2 cups of water and stir it,keep in a medium flame till it becomes thick(no need of string consistency).Add the cardamom powder and keep it aside.
Take the milk powder,all purpose flour,ghee,cooking soda and mix it till crumbly.
Now slowly add the milk and knead it gently to a soft dough,keep it aside for 5 minutes.If it is too thick then add little more milk and knead it well.Pinch a small gooseberry size ball and roll into a smooth ball without giving too much of pressure.
Heat the pan with oil and gheein a medium flame and drop 6-7 and rotate the pan so that all sides of the ball gets cooked evenly.
Once it is cooked to golden brown color drain it  from the oil and drop it in the  sugar syrup.
Soak it in the sugar syrup frt atleast two hours.


Enjoy........................ 

  • If the dough is too thick the jamuns will be hard. 
  • While making the balls do not give too much of pressure to get the smooth finish. 
  • The oil should be in a low to medium flame otherwise the jamuns turn brown without cooking. 
  • Grease the palms to make the balls smooth without cracks.

Sumber http://www.naliniscooking.com

Friday, January 18, 2013

Almond/Badam Milk Powder

I used the store bought badam milk powder to make warm or cold badam milk instantly until I saw this in cookery show in T.V.As almond has lots of health benefits,I try to incorporate in my son's diet either in the morning or for his snack.Sometimes I make this warm badam milk,especially in the winter time to keep the body warm.Whenever we wanted to take a break from caffeinated drinks our first choice would be this flavored warm beverage.This powder is not only used to make badam milk ,it can be used in the payasam or kheer to give a rich and creamy taste.Now on to the recipe.................

 Ingredients

IngredientQuantity
Almonds/badam1/4cup
Cashews10nos.
Pistachios10nos.
Cardamom/ellakai 5-6nos.
Saffron/kungumapoo 10-12 threads
Sugar1/2cup
Turmeric powder/manjal podia pinch(optional)


Method

  • In a microwave safe bowl put all the nuts and roast it for 3-4 minutes,then add the saffron threads and keep it in the microwave for one more minute.
  • Let it cool down completely.
  • Put the roasted nuts,saffron,cardamom in a nixie jar and pulse it to a fine powder.
  • Now add the sugar and grind it for a minute.
  • Store it in an air tight container and refrigerate it.

Badam milk
Method
              Boil a cup of milk and simmer it for 5 minutes,add 1tbs of badam milk and mix it well.
Serve it warm or cold.


Enjoy..........................................

  • Don't grind the mixie or blender continuously while grinding the nuts,as the oil content in the nuts tend to make it like a paste.
  • Store it in the refrigerator to prevent the nutty smell.
  • Adding turmeric powder is purely optional,it is for extra color. 
  • To make masala milk,add a clove and small piece of cinnamon in the milk and add the required amount of powder.

Sumber http://www.naliniscooking.com

Sunday, January 13, 2013

Vegetable Fried Rice

For the day 3 of blogging marathon#24 is vegetable fried rice which doesn't need an introduction.If you ask most of us for the favorite Chinese dish,the answer would be Fried rice and Manchurian.I am not exceptional,Vegetable fried is my all time favorite and whenever we go to restaurant my order would be the simple and delicious fried rice.This rice can be made with left over rice also now on to the recipe..................

Ingredients

IngredientQuantity
Basmathi rice/long grain rice3/4cup
Carrot(thinly sliced)1/4cup
Beans(thinly sliced)4-5nos.
Capsicum/bell pepper(thinly sliced) 1/4cup
Cabbage(shredded) 1/4cup
Garlic/poondu(finely chopped)2nos.
Spring onion(finely chopped)2tbs
Soya sauce1tsp
Black/white pepper powder1tsp
Onion(finely chopped)1/2no.(optional)
Saltto taste
Olive Oil2tbs
Method 

  1. Cook the rice in a boiling water with a tsp of oil and salt and drain the excess water.
  2. Separate the grains and cool it completely and keep it in the refrigerator for 15 minutes.
  3. Heat a wok with the oil,saute the garlic,onion and spring onion.
  4. Now add the veggies one by one and give it a mix,add the salt,keep it for a minute.
  5. Add the soya sauce and stir it well,then add the pepper powder.
  6. Finally add the cooked rice to it and toss it gently till everything gets blend well.
  7. Keep it in a low flame for 2-3 minutes and put off the flame.
  8. Vegetable Fried Rice is ready.

Enjoy...........................................

  • Do not add too much of soya sauce otherwise end up in bitter taste.
  • Keep the veggies crunchy and not over cooked.
  • Chilly sauce can also be added for extra spicy taste,as I wanted milder version I didn't add.
  • If you want to add egg to this rice make the scrambled egg with an egg and add it finally,toss it.
Check out the other marathoners who participate in Blogging marathon#24.
Sumber http://www.naliniscooking.com

Saturday, January 12, 2013

Lachha Paratha


Today's recipe for BM#24 for day 2 under the theme restaurant menu card is Indian bread,for this I chose to make Lachha paratha.
Lachha Paratha is a layered flat bread made in griddle with wheat flour which is similar to the parottas available in South India.This paratha goes very well with any curry or simply with dal and raitha or plain curd,pickle.I served it with the Channa kurma and here is the recipe...........................

Ingredients

IngredientQuantity
Wheat flour21/2cups+1/4 cup for dusting
Ghee/clarified butter3tbs
Salt 11/2tsp
Milk 1/2cup
Wateras needed
Wheat flour1/4 (for dusting)
Ghee3tbs(for brushing and frying)


Method

 In a bowl take the wheat flour and salt,add the ghee.Mix it till it is crumbly,now make a well in the center of the flour and add the milk+water..Knead it well to a smooth and soft dough.Cover it with a damp cloth leave it aside for 30 minutes to 1 hour.
Now take the dough and knead it well for a minute and divide to 6 equal portions.Make into a smooth ball and roll into a circle of 8-10 inch diameter.Apply some ghee and sprinkle some flour to the rolled circle.
Now make pleats from one end to the other(like saree pleats),roll the pleated dough from one end to make a ball(as shown).Dust the surface and roll it carefully without giving too much pressure to a 6-7 inch diameter.
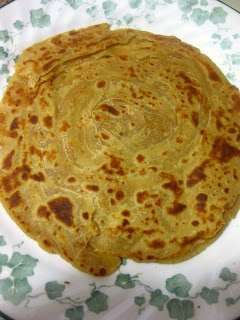
Heat the griddle and add 1/2tsp of ghee,put the rolled paratha on the griddle and cook it.Flip it to the other side and gently press the parathas with the spatula to get crisp.Apply some ghee and cook it both sides get crisp and golden.Take the paratha in a plate and crush it between the palms gently to separate the layers.
Delicious Lachha paratha is ready.

Serve it with curry of your choice.
Enjoy................................................................
  • Be generous with the ghee while frying the parathas to get a delicious and soft parathas.
  • The ghee can be substituted with oil or vegetable shortening but my personal preference is ghee.
  • Cook the parathas in a medium flame to get cooked evenly.

Sumber http://www.naliniscooking.com

Friday, January 11, 2013

Channa Chaat


Another session of Blogging Marathon has started and for this week I chose to cook the Indian restaurant menu card as theme and the menu is from Akbar restaurant.We need to cook a starter,Chinese menu and Rice/Indian bread for each day from the menu.
As I am a fan of chaat items,after seeing the menu I decided to make Channa Chaat which is a healthy and guilt free starter.Now to the recipe............  

Ingredients

IngredientQuantity
Chick Peas/channa(cooked)1cup
Onion(finely chopped)3tbs
Tomato(finely chopped)2tbs
Potato(boiled,cubed) 1/4cup
Green chutney 11/2tsp
Sweet and sour chutney 11/2tsp
Green Chilly(chopped)2nos.
Coriander leaves(chopped)2tbs
Papdis(crushed)3-4nos.
Thin sev2tsp
Chaat masal powder3/4tsp
Salt1/8tsp

For Sweet and Sour Chutney/Katta mitta chutney/Imli chutney

IngredientQuantity
Thick Tamarind paste1/4cup
Jaggery/brown sugar3-4tbs
Red chilly powder1/2tsp
Roasted cumin powder 1/2tsp
Cumin seeds/jeeragam 1/2tsp
Garam masala powder 1/4tsp
Dates/pericchai(finely choppedl)2nos.
(optional)
Salt1/8tsp

For the Green Chutney 

IngredientQuantity
Coriander leaves(washed)1cup(tightly packed)
Mint leaves1/4cup
Green chilly 6nos.
Lemon juice1tsp
Ginger/inji 1/2 inch piece
Salt1/8tsp


Method 
For the sweet  and sour chutney 
  • Mix all the ingredients in a pan and cook it in a medium flame until it reaches the thick consistency.
  • Cool the chutney and store it in the refrigerator.


For the green chutney
  • Put the ingredients given in a blender or mixie and grind it to fine paste with little water.
  • Green chutney is ready.


Channa Chaat
  • In a bowl put the chick peas,onion,tomato,potato,green chilly,chaat masala powder,green chutney,red chutney,salt and mix it well.
  • Finally add the coriander leaves and papdis to it and give it a mix.
  • Put it in a serving bowl and garnish it with thin sev.
  • Serve it immediately.

Enjoy...........................................................................

  • The chutney can be made in the microwave oven also,put everything in a microwave safe bowl and cook it for 7 minutes.
  • The sweet and sour chutney has a long shelf life and stored in the refrigerator for 3 months.
  • Sprinkle the sev just before serving.
  • Adjust the amount of chutney according to personal preference.
  • Pomegranate kernels and chopped raw mango can also used for extra tangy and rich taste.
Check out my fellow bloggers running in Blogging Marathon#24.

Sumber http://www.naliniscooking.com

Tuesday, January 8, 2013

Carrot Lemon Rice-Easy Lunch box Recipe


This is a simple yet delicious one pot meal which is a good option for lunch box too.When I saw this rice in Sangeetha's space so much inspired and its a nice twist to add the carrot in the lemon rice.So without second thought add carrot to the lemon rice next day when I made it for hubby's lunch box and clicked.But the pictures were not clear due to poor light and whenever I made this one after that,I couldn't click.Some how today I managed to click some pictures,here goes the recipe for tangy and colorful rice..........

Ingredients

IngredientQuantity
Basmathi/Sona masoori rice1cup
Lemon juice1/4cup
Green chilly(chopped)5nos.
Carrot(grated) 1no.
Dried red chilly2nos.
Curry leaves1sprig
Coriander leaves(chopped)1tbs
Ginger(grated)1tsp(optional)
Sesame oil/nallennai2tsp
Turmeric powder/manjal podi11/2tsp
Salt11/2tsp
For Tempering
IngredientQuantity
Oil1tbs
Mustard seeds1tsp
Urad dhal11/2tsp
Channa dhal 11/2tsp
Asafoetidaa pinch
Peanuts(roasted)1tbs
Cashews(broken)1tbs


Method 

                           Cook the rice in the pressure cooker or electric cooker along with a pinch of salt,separate the grains and add the sesame oil.Let it cool down completely.

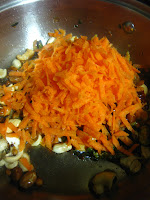
Meanwhile heat a pan with the oil and splutter the mustard seeds,add the urad dhal,channna dhal,cashews,peanuts and asafoetida one by one.Add the green chilly,grated ginger red chilly,curry leaves and toast it for a minute.Now add the grated carrot and  saute it for a minute,add the salt and turmeric powder,mix it well.Put off the stove and add the lemon juice.
Stir it well to get everything blend.Add this mixture to the rice and mix it gently.
Colorful and tangy rice is ready.

Serve it with papad,chips and pickle.

Enjoy.......................................................

  • The amount of lemon juice depends the tanginess of the lemon.
  • If you are packing it for lunch box add little more(1tsp approximately) lemon juice as the flavor and the tanginess get incorporated.
  • Do not boil the lemon juice otherwise it will end up in bitter taste.


Sumber http://www.naliniscooking.com

Friday, January 4, 2013

Aloo Jeera/Jeera Aloo/Cumin Flavored Potato Fry

 Everybody likes potato in any form,this aloo jeera is a flavorful potato fry which can be made in 5 minutes if the potatoes are boiled.I make this fry whenever we wanted to have a simple and comforting lunch such as rasam or dhal along with rice.This fry goes very well with rotis too,now on to the recipe...................
Ingredients


IngredientQuantity
Potato4nos.(medium size)
Green chilly(finely chopped)1no.
Cumin seeds/jeeragam1tsp
Red chilly powder/milagai podi 3/4tsp
Coriander powder/dhaniya podi 1/2tsp
Cumin powder1/2tsp
Turmeric powder/manjal podi1/2tsp
Coriander leaves(chopped)2tbs
Saltto taste
Oil2tsp
Method

  • Boil the potatoes in a pressure cooker for a whistle and peel the skin,cut into small chunks.
  • Heat the pan with oil and crackle the cumin seeds and add the green chilly.
  • Add the potato cubes and stir it for a while,now add the powders and salt to it.Mix it gently and keep it in a medium flame for 5 minutes with stirring in between to prevent burning.
  • Finally add the chopped coriander leaves and turn off the flame.
  • Simple yet delicious aloo jeear is ready.
  • Serve it with dhal or rotis.
Enjoy.............................................. 

  • Instead of cumin and coriander powder separately,a tsp of dhania  jeera powder can be used.
  • Cook it in a medium flame to prevent burning of the powders,otherwise the color and taste will change.

Sumber http://www.naliniscooking.com